The MEDIASHARE Learner Guide defines how learners can:
- Search for and access lecture recordings from any internet-connected PC or iOS and Android mobile device.
- Bookmark content.
- Complete quizzes and/or surveys that faculty have assigned as part of video or course content.
- Upload multimedia files to a multimedia library.
Settings
Folders
Create folders to organize your media library. Or click Library > Media >
+ Add Folder.
Tags
Create keywords to identify, organize, and make searching for videos easier.
Multimedia
Upload multimedia files to your multimedia library.
Notifications
Set notification preferences for assessments and online courses (where available). Click the Notification icon at the top of the screen to view Notifications.
Home/Dashboard
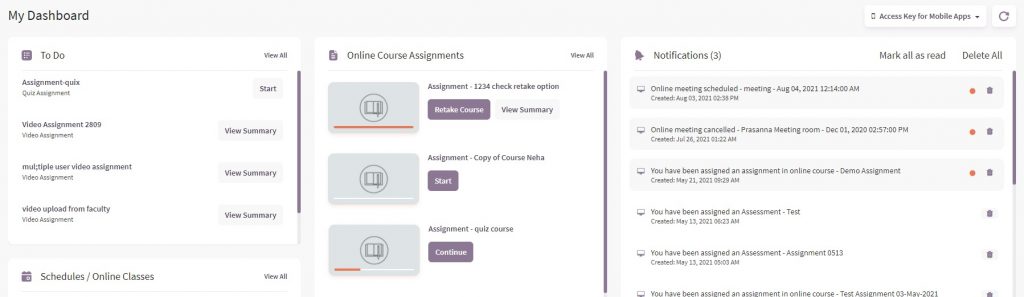
To Do List
Use the To Do List to go directly to assignments or assessments.
OR
Click View All to go to Assessments.
Schedule/Online Classes
Join Online Classes (where available) or start or continue Online Course Assignments.
OR
Click View All to go to Live Streaming/Online Class/Online Meeting.
Online Course Assignments (Learners only – where available)
Start or continue online course assignments, or view a summary of completed courses and retake the course.
My Calendar
Appears if the Administrator has enabled this feature.
Notifications
Note: Click Settings > Notifications to set notification preferences for assessments and online courses (where available).
- Click the Notification icon at the top to view Notifications.
Update your Mobile number
Click Update your Mobile number so meeting notifications can also be sent to your cell phone. Or click My Profile to add your cell phone number. Note: Mobile Number will only be used for schedule notifications.
Retake Course
Click Retake Course once an online course has been completed if enabled.
My Notes
To take notes, click Profile > My Notes. Save notes taken in My Notes and access from any computer. Delete all or specific notes. Click Email Notes send the notes to your email.
Library
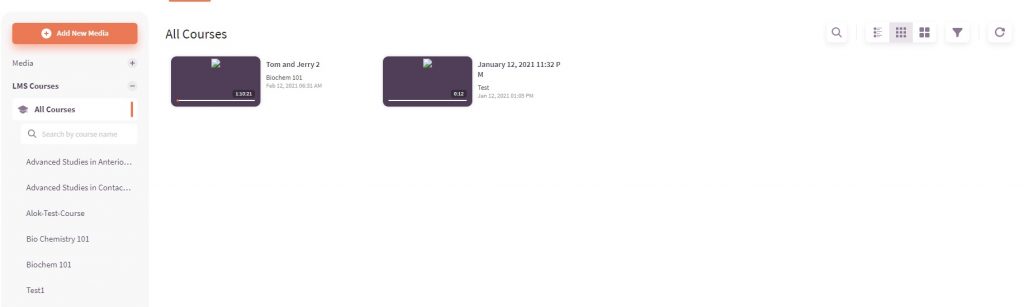
Click Library to view lecture captures and manage your multimedia library.
Media
Add, view and share media files, manage your media library, and view media files shared with you.
You can replace video and audio files but keep the original URL/embed code.
Note:
- Only available when there is one camera stream.
- Updating existing video/audio will delete existing bookmarks, in-video quiz, surveys, captions and OCR.
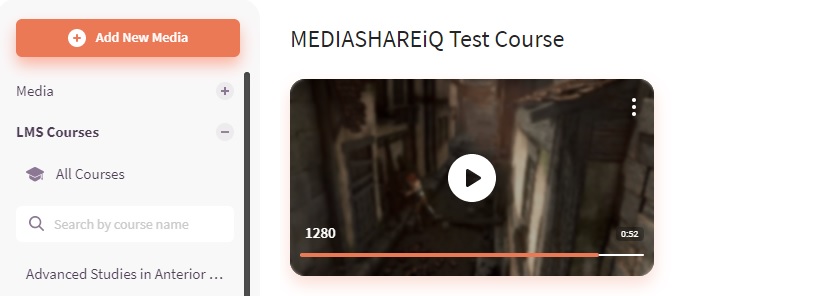
LMS Courses
Lecture recordings are organized by course.
Search Features
IMPORTANT! Click Library, select a Media or LMS folder and then search by:
- All
- Media information
- Transcription
- Topic
- Comments
- Bookmarks
Keyword Search
IMPORTANT! Click Library, select a folder on the left, click the Search icon, and then click the drop-down to search by the following:
- All
- Media Information
- Transcription
- Topic
- Comments
- Bookmarks
Filter
Click the Filter icon to:
- Filter by Date, Duration, Name or Rating (sort the list in Ascending or Descending order).
- Filter by All videos, Last 7 days, Last 30 Days, or by a specific date range.
Search features – Search within a specific video
Click any video and then search by keywords within the selected video to go to that keyword in the recording.
Search LMS Courses
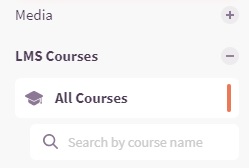
Click LMS Courses > Search by course name.
Grid View & Box View
Click the icons at the top of the Library screen to view folder contents in a table format or a more condensed view.
Create & Manage Folders
To create and manage folders to organize your Media Library:
1. Click Settings > Media Management > Folders > Add Folder
OR
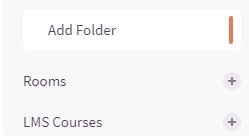
Click Library > Media > Add Folder
OR
Click Library > Add New Media > and then click the Add Folder icon
Add New Media
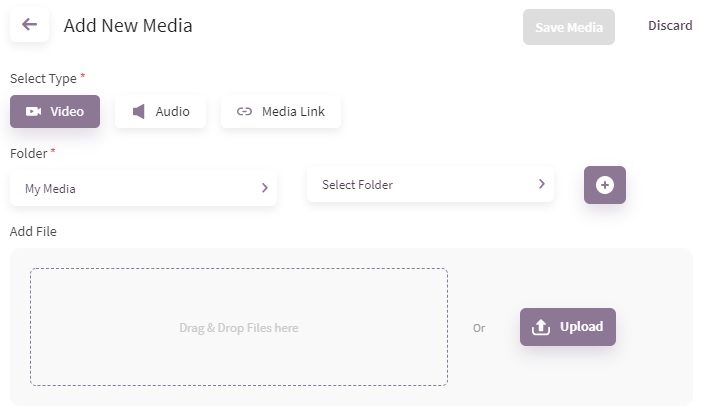
To add multimedia files to your Media Library, click Library > Add New Media to upload video, audio, media links, and document files to your media library or course library.
IMPORTANT!
- When the upload is in progress, do not refresh or close the page.
- Do not refresh the browser during upload. It will terminate the upload process and media will not be uploaded.
Note:
- You can replace video and audio files but keep the original URL/embed code:
- Only
available when there is one camera stream.
- Updating existing video/audio will delete existing bookmarks, in-video quiz, surveys, captions and OCR.
- See Create & Manage Folders for more information about creating folders to organize your media files.
Supported audio and video formats
Video: MP4, MOV, AVI, WMV, ASF, WMA, FLV, WEBM, MKV, MPEG
Audio: MP3, WAV, M4A
Edit Details
- Click Library > Edit.
General Info
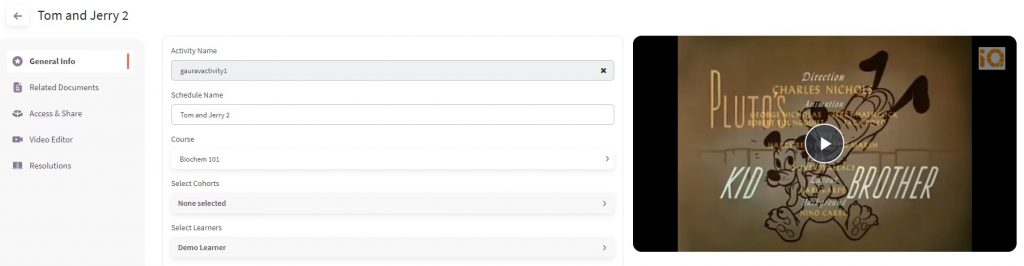
- Click Library and then click Edit.
- From the General Info tab, edit video details, add Tags to make searching for the video easier (optional), and then click Save.
Thumbnail
- Click Library > Edit > Thumbnail.
- Either select a frame from the video or upload an image to appear as the thumbnail view for the video. Note: .png, .jpeg, .jpg files only.
Related Documents
- Click Library > Edit > Related Documents.
- From the Related Documents tab, attach .pdf, .docx, .xlsx, .jpeg, .jpg, .png files with the video (optional).
Captions
- Click Library > Edit > Captions.
- Upload a Closed Caption file (.vtt file) and then click Save.
View Transcription
If the recording has been transcribed, click the Closed Caption icon at the bottom of the video.
Access & Share
IMPORTANT! Video can be shared if the Administrator has enabled Allow Media Sharing in Settings > Video Management > Library and Playback.
MEDIASHARE enables the password-protected distribution of video content.
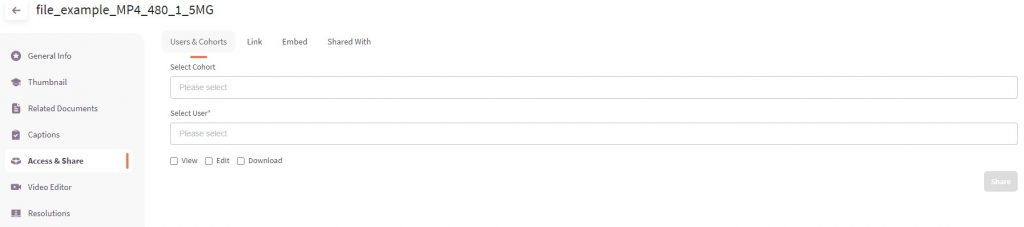
- Click Library > Edit > Access & Share.
- From the Access & Share tab:
|
Users & Cohorts |
Select the cohort and users and give View-only, Edit, or Download capability. |
|
Link |
Email a link to the video. Note: The link will require a valid login to MEDIASHARE to view. |
|
Embed |
Copy the link to the video to embed in your LMS. |
|
Shared With |
Lists the Users/Cohorts you’ve shared the video with and indicates the video access permissions. |
- Click Share. Shared videos appear in Library > Shared with Me.
Edit in Video Editor
Use the video editing tool to clip or create a series of video clips.
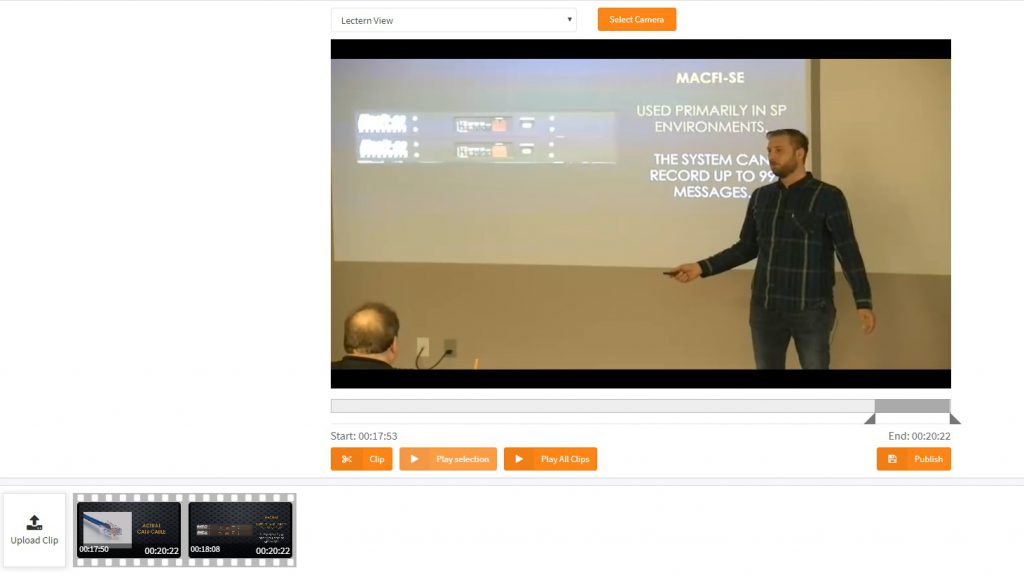
- Use the left slider button to set the beginning of the clip and then use the right slider button to set the end point of the clip.
- Click Clip to create a clip from the overall video file. Click Play Selection to view the clipped video.
- You can create multiple clips from the video that can be played together as one file. The clip(s) appears at the bottom of the screen.
- Hover your mouse over the clips to change the order of the clips or delete and add more clips.
- Click Play All Clips to view the edited video.
- Click Publish.
Mark Video Public or Featured
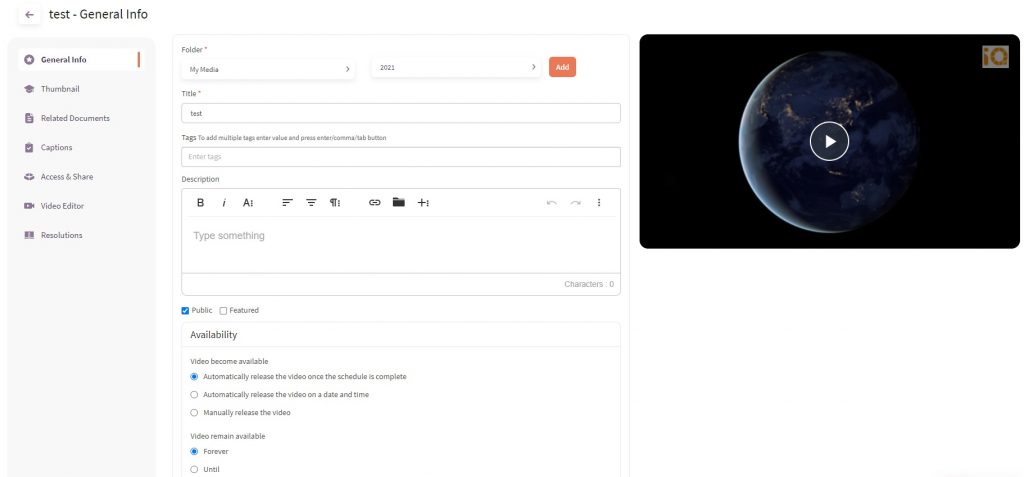
- If you are the owner of the video, the Public checkbox appears. Click the Public checkbox to make the video visible to all MEDIASHARE users.
- If the Public checkbox is checked (see above), then the Show on Landing Page checkbox appears. Click this checkbox to allow the video to appear in the “What’s New” area on the landing page.
- If the Public checkbox is checked, then the Featured checkbox appears. Click the Featured checkbox to allow the video to be accessible to any user on the Login screen. (Login not required)
Playback Video
Click Library, select Media or LMS Courses, select the folder, and then click the Play icon.
Play Audio
Click Play Audio to switch to audio-only mode.
- Click Library and then select the Video.
- Click Audio to switch to audio-only mode.
Camera Views
For LMS Course videos, click the camera views and the video windows to toggle between camera views, such as the presenter view or the presentation view.
IMPORTANT! Camera views appear depending on the viewing profiles enabled by the Administrator.
Video Tabs
Details
Displays the name of the video, video folder, number of plays, edit features, and ability to rate the video (if the Administrator has enabled Allow Media Rating in Settings > Media Management > Library).
Bookmarks
- Add and reply with pre-defined bookmarks and comments
- Record video and audio clips, add and reply to comments (IMPORTANT! You must allow camera and microphone access).
- Upload multimedia files, either new or from your multimedia library.
To mark bookmarks as private, click the lock icon. Private bookmarks can also be made public.
Note:
- Old bookmarks will be marked as Public – only newly created bookmarks can be marked as private.
- Bookmark search results will only display public bookmarks and private bookmarks for the logged in user.
Content
View video transcription content if enabled and available.
Quiz
Indicates if there is a quiz associated with the video.
Survey
Indicates if there is a survey associated with the video.
Download Video
IMPORTANT! Video can be downloaded if the Administrator has enabled the media download feature.
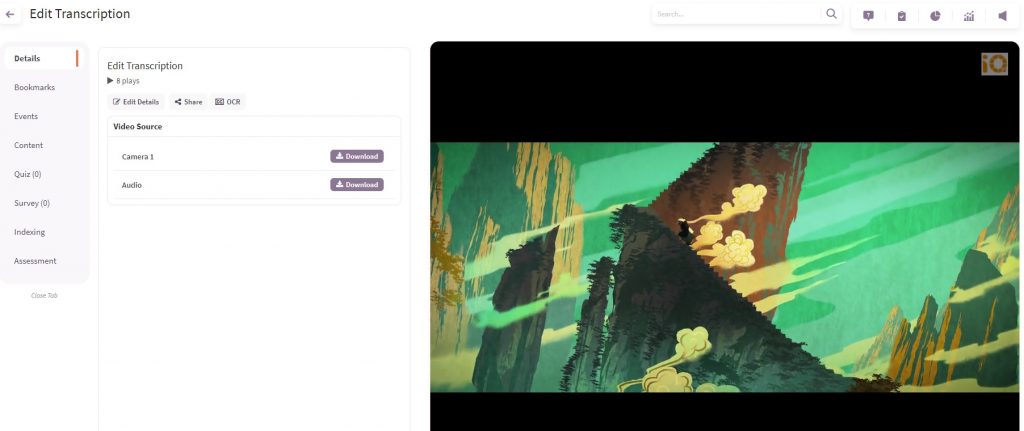
- To download video, click Libraryand then click Play for the video you want to download.
- Click Download to view the complete video or audio for the selected video source.
- Click the arrow next to the file name at the bottom of the screen.
- Click Show in Folder and then save the file.
Live
View Live Lectures

Click Live > Live Lecture Streaming to view Scheduled Live Sessions for Today, Next 3, 7 or 30 Days, or for a specific date range. Click Refresh to update. Note: You can pause and then resume playing live stream recordings.
Live Streaming Video Tabs

Live Meeting
Available if the Administrator has enabled this feature.
Live Meeting Requirements
• Your web server must have access to the Internet for video conferencing.
• Your computer must have Internet access to start a video conference.
• Your computer must have a web cam and a microphone enabled.
View Live Meeting
- Click Live > Live Meeting to view scheduled video conference meetings. Note: Live Meetings only appear here for the Duration indicated when the meeting was scheduled.
- Click the meeting and then follow the directions on the screen to launch the video conference.
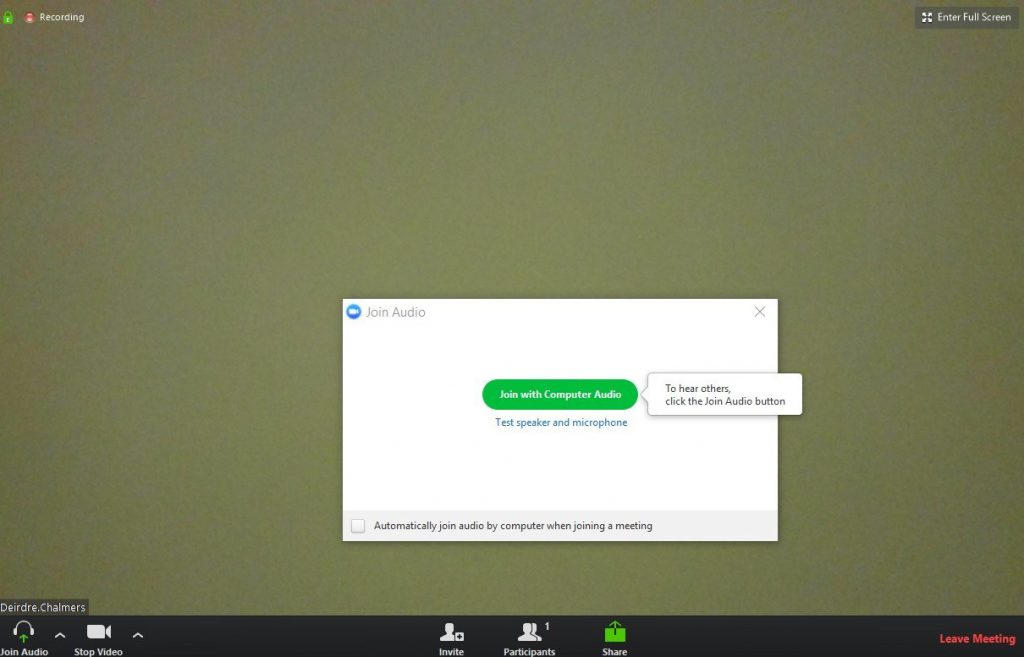
3. Join with computer audio to hear others in the conference.
4. Click the arrow next to Join Audio to test microphone and speakers and adjust audio settings as needed.
5. Click Participants to see how many people have joined the meeting and to manage audio for participants.
6. Click Invite to add participants to the meeting: either click Copy URL or Copy Invitation to cut & paste the link and meeting ID into your email.
7. Click Share to select the window or application that you want to share and then click Share. Note: Click Advancedfor advance sharing features:
Portion of Screen: Share a portion of your screen by using a resizable window.
Computer Sound Only: Share audio from your computer without sharing your screen.
Content from 2nd camera: Share content from a second camera.
8. Click Pause/Stop Recording to pause resume recording or stop recording.
9. Click Leave Meeting to assign a Host if want to keep the meeting running.
10. Click End Meeting to end the meeting for all participants.
Assessments
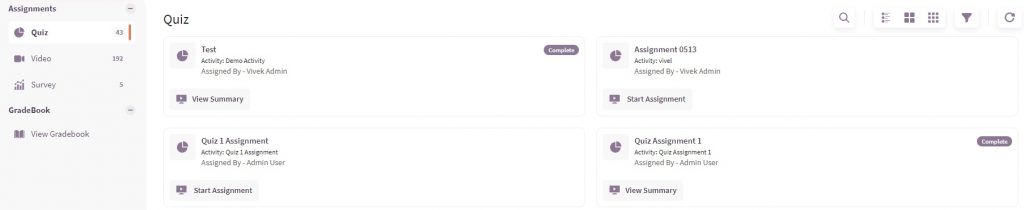
Use the Assessments module to enable users to manage learner evaluations, assignments and surveys from a single location: Learners complete assignments (quiz, video, survey) and track progress with a gradebook that displays all assignments, due dates and scores.
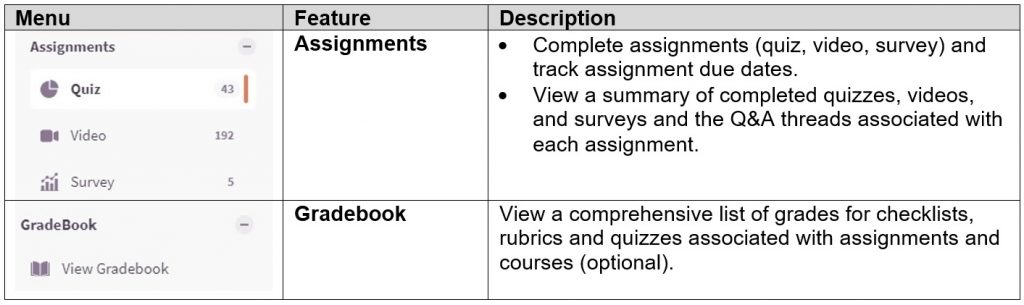
Assignments
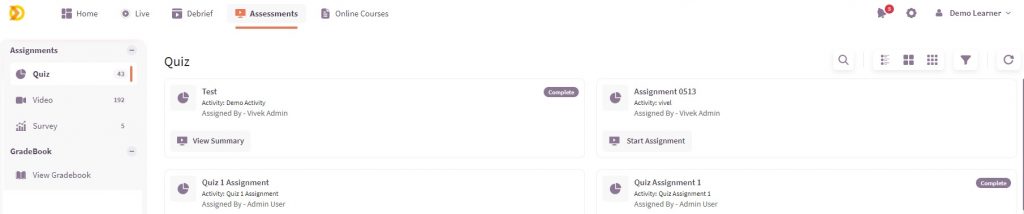
Click Assessments > Assignments to complete assignments (quiz, video, survey) and track assignment due dates.
Gradebook

Click Assessments >View Gradebook to view a summary of completed quizzes, videos, and surveys and the Q&A threads associated with each assignment.