The Administrator completes the MEDIASHARE Settings, the one-time system set-up tasks to add users and enable video recording. Click the Settings icon on the toolbar in the upper-right.
Organization tab – Administrator only
Institutes
EMS creates the Institutes to organize users by divisions within your institution. The Administrator can edit. Click Settings > Organization > Institutes.
Branding
EMS creates the Branding for your MEDIASHARE site. The Administrator can edit. Click Settings > Organization > Branding.
Modules & Subscription
EMS defines the recording settings and the MEDIASHARE Cloud subscription level.
Users
IMPORTANT! Users are added to the MEDIASHARE system when importing Courses from your LMS. The users become active in MEDIASHARE when they first log into the system, either directly or via the LMS.
Click Settings > Organization > Users > Import Users to use a template file to bulk upload users into MEDIASHARE.
See Adding Users more information.
Profile Custom Fields
Create custom fields on user profiles:
- Click Settings > Site Settings tab > Settings and then click Enable User Profile Custom Fields.
- Click Settings > Organization tab > Profile Custom Fields > Add Fields to:
- Name the custom field
- Add text, drop-down and date fields to user profiles
- Select the user role the field should be available for
Click Settings > Organization tab and then click the Edit icon in the Action column to view the custom fields.
Click Analytics > Custom Fields Report > Download Report to view user profile custom fields usage.
Cohorts
Click Settings > Cohort > Add New Cohort to group learners by graduation year.
Courses (Administrator & Faculty)
IMPORTANT! Contact EMS for more information about configuring MEDIASHARE with your Learning Management System.
Click Settings > Organization > Courses to add, import and manage courses and upload SCORM-compliant courses from your LMS..
IMPORTANT! Recordings associated with a course will be deleted if you delete a course from Settings > Courses.
Enable Transcription
Click the Enable Transcription checkbox for the desired course.
Enable Certification
- Click Settings > Courses and then click Add or Edit Course.
- Click Enable Certification.
- Select the select the template. Click Preview to view the file.
- Click Continue.
- Add the Course Name, Course Author Name, and then select and upload the Course Author Signature and Institute Log files.
- Click Save.
Download Certificate
Learners click user name in top right and then click My Certificates.
Click Settings > Courses > Add/Edit Course > Faculty or Learners to add faculty and learners or cohorts to a Course.
Click Settings > Courses > Scenarios & Didactic Content to associate instructional content with a course.
Set the Pass Percentage required for scenarios and didactic content for a Course or click N/A if there is no score required
Terms
Click Settings > Organization> Terms to define the semesters for each Institute.
Media Management
Library & Playback
Click Settings > Media Management > Library & Playback to enable the following features for your multimedia library:
Activity
Click Settings > Media Management > Activity to create user-defined video activities.
Folders
Click Settings > Media Management > Folders > Add Folder to create folders to organize your media library.
Tags
Click Settings > Media Management > Add New Tag to create keywords to identify, organize, and make searching for videos easier.
Multimedia
Click Settings > Media Management > Multimedia to upload video, audio, media links, and document files and then share with selected users/cohorts.
Bookmarks
Click Settings > Media Management > Bookmarks to add bookmark to allow administrators and faculty to use standard bookmarks to mark specific points in video.
Video Watermark
Click Settings > Media Management > Video Watermark to add a watermark image to videos.
Video Transcoding
Click Settings > Video Management > Video Transcoding to set additional video resolutions for optimal viewing (Administrator only). IMPORTANT! Storage requirements increase significantly for each new format you enable.
Video Transcription
Click Settings > Media Management > Video Transcription to:
- Manage which Faculty members can request transcription (All or select specific Faculty members)
- View Video Transcription Usage
Video Capture – Administrator only
Rooms
Click Settings > Video Capture > Rooms > Add New Room to define the rooms and cameras for video recording.
Click the Edit icon under Actions and then enable PTZ (pan/tilt/zoom) camera capability. (where available)
Devices
Click Settings > Video Capture > Devices to add, edit and delete devices for video recording.
Note: Click the icon in the password column to view the password for this device.
Recording Settings
Click Settings > Video Capture > Recording Settings to define video recording settings.
Viewing Profile: Enable recording of the presentation view, speaker view, or multiplexed view (combination of presentation and speaker views).
Review Lecture before Publish: Enable ability to edit video before publishing the video to learners.
Number of days to keep downloaded content: Indicate the number of days to keep downloaded content on mobile devices.
Zones
Click Settings > Video Capture > Zones to define the recording zones.
Media Sources
Capture Sources
EMS defines the capture sources.
Assessments
Quizzes
Click Settings > Assessments > Quizzes to create in-video/in-assignment quizzes for learners.
Surveys
Click Settings > Assessments > Surveys to create in-video/ in-assignment surveys for learners.
Checklists
Click Settings > Assessments > Checklists to create a learner assessment to add to an assignment.
Rubric
Click Settings > Assessments > Rubric to create a scoring rubric to add to assignments.
Competency
Click Settings > Assessments > Competencies to create competencies to evaluate learners against specific criteria.
Integration
LMS Settings
EMS defines the LMS settings.
Notifications (Administrator & Faculty only)
Settings > Notifications > Preferences to manage email notification preferences for assessments and online courses (where available). Click the Notification icon at the top of the screen to view Notifications.
Setting > Notifications > Email Templates to add, search for, edit, and delete email templates and see the date the template was created. You can also mark the template as Active or Inactive.
Audit Logs (Administrator only)
Logs all system-generated emails, including automated emails to users added individually, password resets, video processing exceptions, and automated email notifications of scheduled lectures.
Site Settings
Click Settings > Site Settings to update web site settings:
| Enable Resources | Enables Resources section to be added to the Dashboard. Click Settings > Organization > Resources to add attachments, select the start and end dates and user roles the resources should appear for. |
| Resources Title | Changes Resources section title on the Dashboard, such as Updates, Announcements, etc. |
| Enable Online Course Certification | Click to enable Online Course Certification. |
| Enable Course Certification | Click to enable Course Certification. |
| Enable Sticky Notes | Adds My Notes section under User Profile dropdown menu to enable users to take notes and then send the note to email. |
| Enable My Calendar | Add My Calendar to Dashboard. |
| Site title | Title of your web site. |
| Select Time Zone | Select your time zone. |
| Daily Digest Schedule | Select the time to send users automatic emails. |
Manage Item Menu Naming
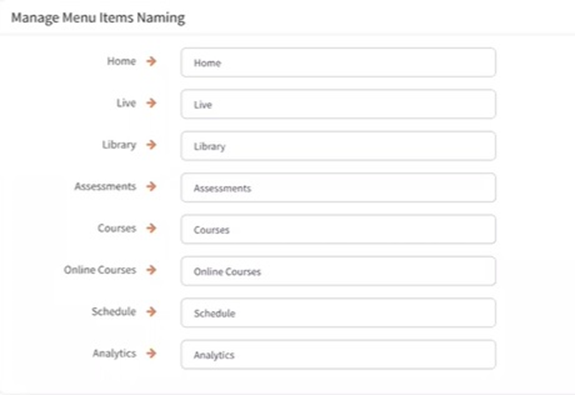
Click Settings > Site Settings to customize the names of the menus at the top of the screen.